Pages

Wednesday, June 12, 2013

Thrifty Hi-Lo

Hi-lo skirts are really popular right now; not only are they funky and breezy, but they don't blow off of your legs when it's a windy day! The problem is that they aren't really a thing from the past, so Goodwill isn't going to have any $3 hi-lo skirts for ya. But they are a quicky to put together if you know what you're doing!

 You'll need:
-a longer skirt
-scissors
-pins
-iron
-sewing machine


1. Try on the skirt and figure out what length you want the front to be. Remember that you'll be hemming the edge, so allow for an inch or two of extra fabric.

2. Fold the skirt in half the "wrong" way, with the sides facing up and down. Lay your skirt out flat on a table or the floor.

3. Cut the skirt from the length you decided all the way to the back edge, making an arc. You can do one side at a time then copy the other side or you can cut through both layers in one swipe!

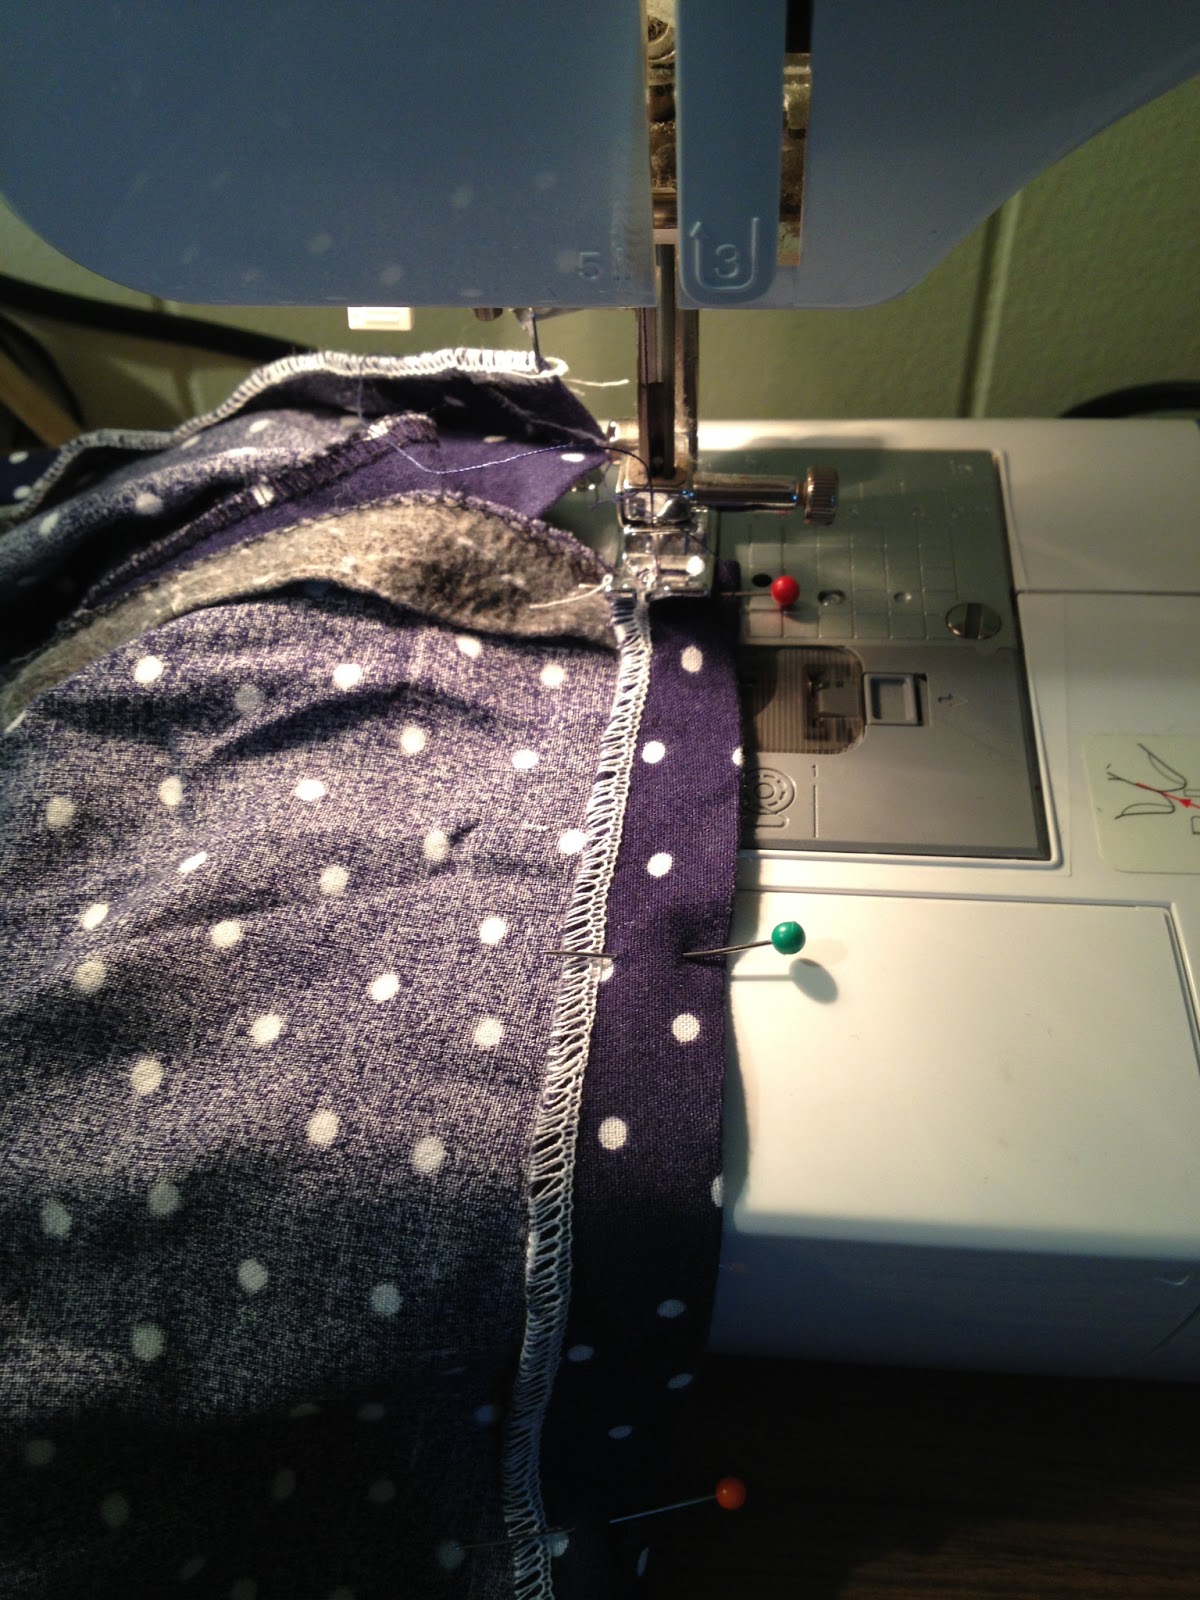
4. Surge the edges if you have a surger. Then iron a hem on the edge, folding up the desired length of fabric and creasing. When I did this originally I didn't think about the hem showing in the back because of the different lengths of the skirt. Be mindful of that! The hem on the back WILL show because it's longer! So make sure you fold it twice to get rid of a nasty edge :)


5. Pin the hem and then sew away! Because the fold is arced, it might require some inventive manipulation to get the desired look for the hem. You can do it! (This picture is before I decided to fold the hem again and sew to hide the surged edge.)

6. Iron out the skirt again, pressing the hem, and you're ready to go out!


Have fun,
Rebekah

Monday, April 1, 2013

Last Minute Easter Fun!

So today I decided that I wanted to make some thread eggs! I had seen a friend make some with fabric stiffener and the threads didn't all stay down! So I tried it out with my favorite craft supply ever: Mod Podge! Can't go wrong with it? Right? :)

So I went to the dollar store and got some cheap balloons and returned home to dig out my old embroidery thread boxes! I didn't have a lot of the exact same color, so I grouped them by colors that were similar!

Set up your area to work! I used a cookie sheet with wax paper to catch the glue drips!


1. I blew up some balloons to the size that I wanted my "eggs" and I went to town!


2. The trick is to get the thread wet with the Mod Podge so that it wraps around the balloon and stays. But you also don't want it so wet that as you're wrapping it, the thread is slinging Mod Podge everywhere!


3. So you get them all wrapped and then hang them somewhere so they can dry. I chose the light fixture in the kitchen. It's low and has prongs to easily hang string and balloons from!


4. Wait for the balloons to dry overnight and then pop the balloon and slowly peel the balloon out of the egg. Hopefully you took #2 to heart because the less Mod Podge there is between the strings (on the surface of the balloon) the less film there is left between the threads once you take the balloon out. Look at the picture. You see the filmy stuff that's reflecting light in between the threads? that's because I didn't know what I was doing and I put MP onto the ballon surface for a while. *BAD IDEA*

5. If you have a major egg decomposition and it turns into a kinda hard lump of embroidery thread...do not fear! It's easier than you think to fix! Take one of your unused balloons and put it down inside the crumpled egg..and blow up the balloon as hard as you can! Waaa laaa! Your egg is alive again!

6. Optional: I took my eggs outside and sprayed them with some Mod Podge Pearlized Glaze (it comes in a spray paint can) and it made my eggs look kinda sparkly and prettier, I think! :)


7. Try it out! It takes some time getting used to wrapping the wet string...and I would suggest going outside or in a garage to do this craft because it does sling some drops of glue everywhere... You can also make the balloons bigger/rounder. Experiment with different types of string. Embroidery thread took a while to wind because it's rather thin. But yarn wouldn't be as slow!

Have fun creating!
Rebekah